Apothecary Cabinet Makeover
Sometimes projects have a way of presenting themselves in the form of a mess. I have been dipping my toes into herbalism for years, but in the past year I’ve inadvertently doubled my skills. I began fermenting garlic in honey, making my own cough syrups, and growing and collecting medicinal herbs. My kitchen cabinets, counters and pantry were constantly covered in my concoctions. My husband finally said enough is enough, and suggested a piece of furniture to corral my science experiments, fermentation, and raw ingredients. I needed an apothecary cabinet and I was excited about another furniture makeover project.
What is an Apothecary Cabinet?
An apothecary cabinet is a loose term to identify a place where home remedies and materials are stored. Such a cabinet can also store bottles, jars, and other vessels as well as measuring devices and tools. An apothecary cabinet can be a piece of free-standing furniture, a single cabinet in a kitchen or bathroom, or a pantry. It can be a box or small chest used for storage.
I needed something large. I needed somewhere to cure my tinctures or dry and store herbs, and a place to stash my bottles and fermentations. A traditional china cabinet was not ideal because I needed a surface to place jars and bottles to measure and distill. I began scouring Marketplace for a wood hutch that I could makeover.
How to Paint and Refinish an Old Hutch
After about two weeks of unsuccessfully looking for an old hutch on Facebook Marketplace, I finally found this lovely lady.
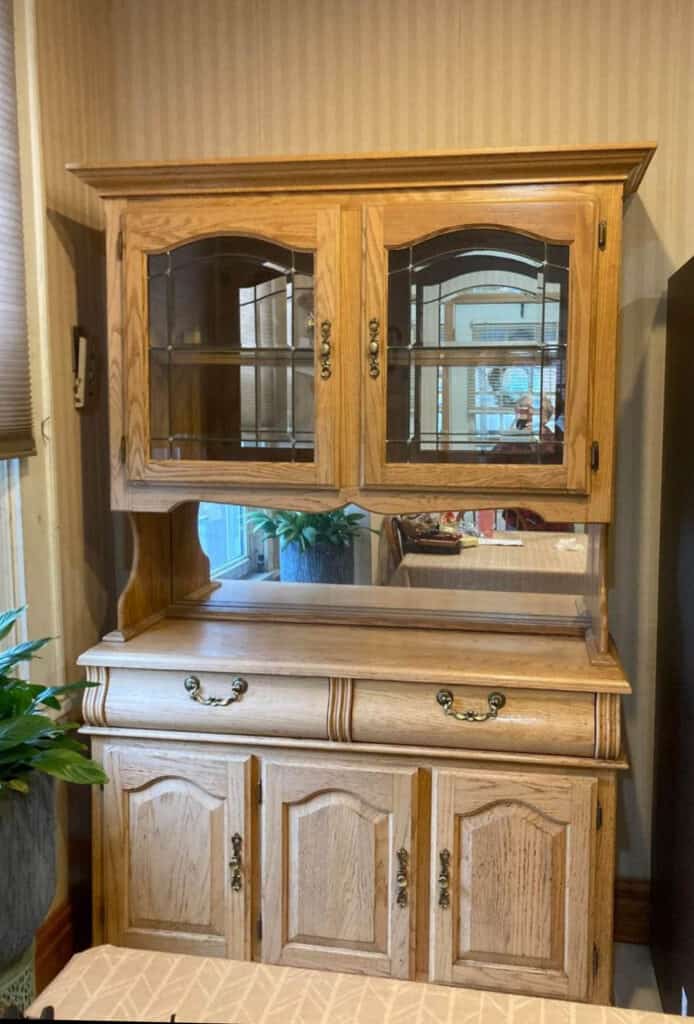
I loved the solid oak doors, the lovely curved drawers, and the ample counter space this hutch provided. The light inside the top cabinet was a bonus. I also liked being able to keep pretty items, such as jars full of herbs, in the glass cabinets in the top. There is a place for less aesthetically pleasing items underneath. This hutch provides more than enough space for all my tinctures, tools, and herbal implements.
Apothecary Cabinet Makeover- The Plan
I began this process thinking that I would paint the cabinet charcoal gray to provide a subtle contrast to the black walls in my dining room. Once I started painting, I realized that the contrast was too subtle. I headed to my local specialty furniture shop to look at paint. I had never used Fusion Mineral Paint before, but I was an old pro at using chalk-style paint. After hearing a glowing recommendation from the shop owner, I decided to try the mineral paint. I selected a color called Manor Green.
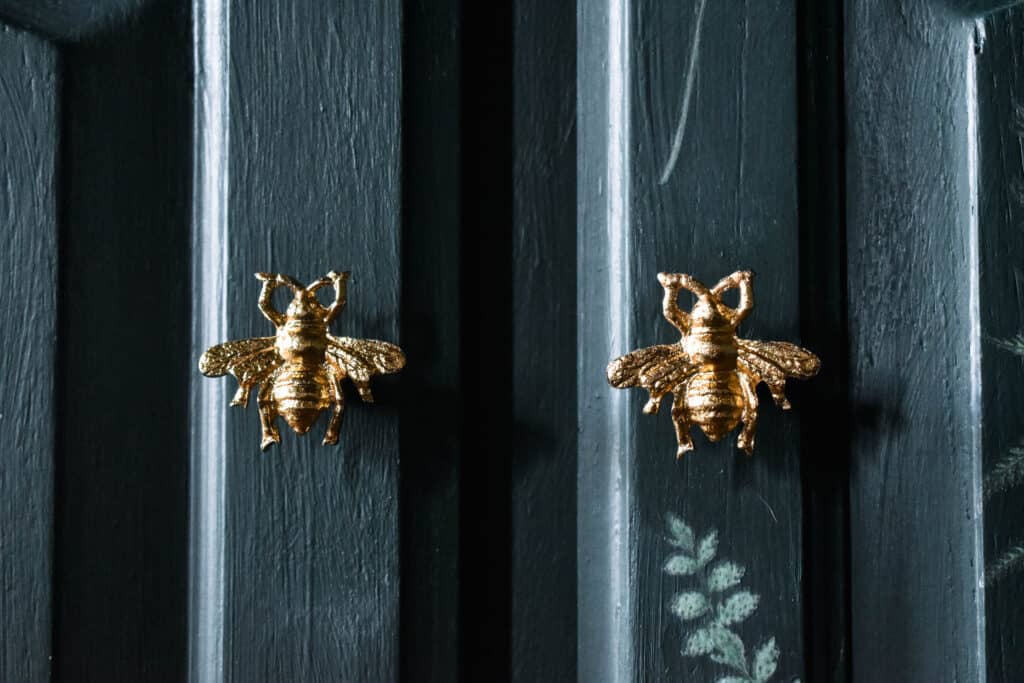
I selected some lovely gold bee knobs for the cabinet doors and copper pulls for the drawers. I knew that the pulls would need to be painted, but the shape was perfect. You can find the knobs here and the handles here.
Apothecary Cabinet Makeover- The Process
I started by removing all doors and hardware. The door hinges would be reused for the project, but the old hardware was donated. I also removed the glass panes from the upper cabinet doors for easy painting. Then I prepped all the wood with TSP to remove any grease and make a clean slate.
I painted all surfaces with the Fusion Mineral Paint. This paint is significantly thinner than chalk-style paint. The color is very concentrated and I was surprised how well it covered. I used a paint extender to provide additional drying time and lessen brush strokes. Two thinly applied coats provided perfect coverage.
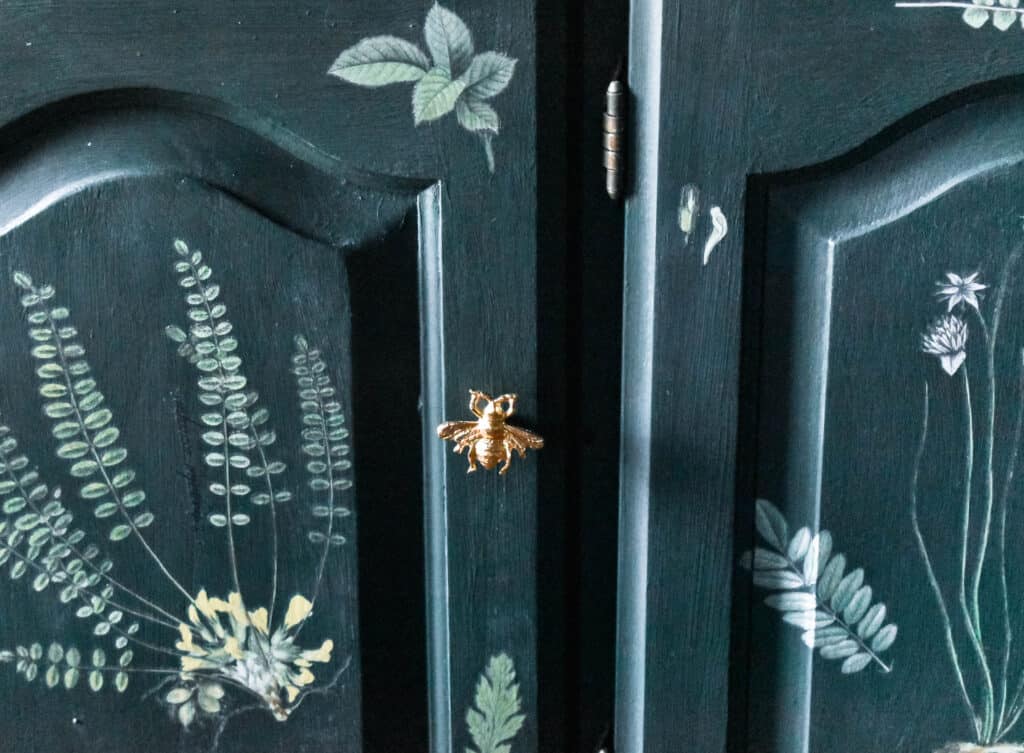
Next I added these botanical furniture transfers I got at the furniture refinishing store. The product is called Iron Orchid Designs in the pattern Fronds Botanical. I cut each design out of the plastic backing, placed where I wanted them and rubbed the backing with a quarter until the transfer was completely on the hutch. This was my first time using a transfer and I’ll definitely be doing it again. This piece is now anything but plain. I coated all of the paint with some clear furniture wax to protect it.
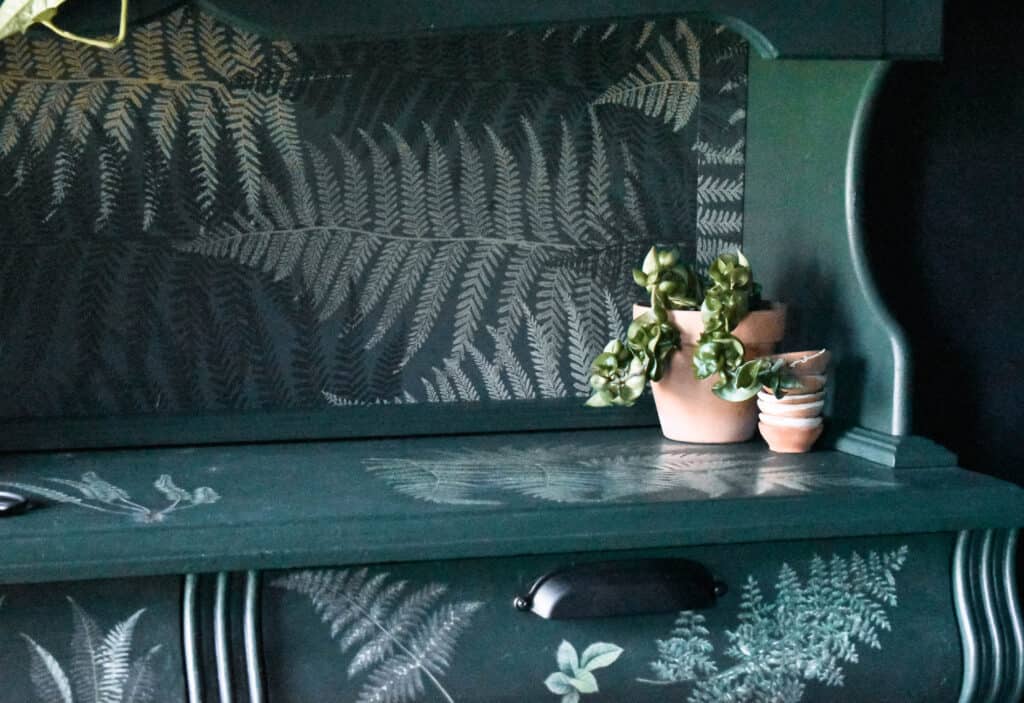
I wasn’t a huge fan of the mirror above the counter, so I covered it with peel and stick wallpaper. You can see it here. It was tricky to apply without bubbles, but the mirror provided a smooth surface. I cut the wallpaper slightly larger than the area I needed so that there was about a 1” overlap on all sides. I removed the backing, started application in the middle of the mirror, and worked my way to the outside. Then I trimmed off the excess with a utility knife.
Finally, I replaced all of the cabinet doors and hardware. The new cabinet pulls were originally copper. I knew I’d need to paint them, but they were the right size. I tried painting them gold, but I didn’t want them to compete with the bee knobs, so I ended up spray painting them black. Here is the finished project!

This apothecary cabinet is definitely a statement piece. It get a ton of attention from guests and I am in love with it. The drawers store all of my small tools and trinkets. I keep my essential oils and liquid ingredients in the bottom cabinet. My jars, herbs and dropper bottles are in the top cabinet. There is a small built-in light in the top I can use when needed.
I hope you loved my apothecary makeover. I’d love to hear your ideas for my next furniture makeover in the comments below!
Blessings from the Bluegrass,
Luci
Sources
(Amazon affiliate links)
You can see my furniture hardware here and here.
My peel and stick wallpaper is here.
If you’re curious about the wall color used behind this lovely piece, you can find all the paint color details in this post.
The furniture refinishing supply store is called Dresser Up Vintage Boutique in Newport, KY. You can visit the site here. The owner Wendy is very helpful and knowledgable. Her site is here.
The furniture transfer I used was Iron Orchid Designs in Frond Botanical Transfer. You can purchase it here.
Some of the links on this blog may be affiliate links, which means I may earn a small commission if you make a purchase through those links. This comes at no extra cost to you and helps support the content creation on this blog.
It turned out so well and your post is very well written! It has personality and information ☺️. Can’t wait to see the next post!
Thank you so much!! I can’t wait to get it out soon!
Very neat blog. Really Great.
Thank you!
Everything is very open with a really clear description of the issues. It was definitely informative. Your site is useful. Thank you for sharing!
Im obliged for the blog post.Really looking forward to read more.
I really liked your article post. Fantastic.
I think this is a real great blog. Fantastic.
Thanks so much for the blog.Really thank you!